Complete Guide to 3D Room Design and Visualization in Blender (Full Project)
This isn’t your typical polished course or tutorial. Instead, watch a real project unfold – from scanning the room to delivering the final images.
No script, no re-takes — just the actual creative process as it happened: making decisions, solving unexpected problems, trying different techniques, and thinking out loud through the whole project.
If you have any questions before purchasing, feel free to reach out at support@blenderqueue.com. I’ll be happy to help!
Over 10 hours of real-time content:
- 1. Preparing 3D Scans
- 2. Building a Clean 3D Room Model from Scans
- 3. Adding Windows, Materials, and Making Test Renders
- 4. Modeling a Desk and Placing First Interior Objects
- 5. Lighting Setup – Creating a Controller Panel for Lights & Environment
- 6. Room Vision, Adding Objects & Making Custom Ceiling Lighting
- 7. Modeling a Sliding Door and Adding an Acoustic Panel with Wood Slats
- 8. Wall Color Test, Customizing Sofa & Adding Shelves with LED Lighting
- 9. Adding Small Objects & Custom AI Wall Art
- 10. Designing the TV Wall, Shelf Items & Comparison Render
- 11. Nighttime Look Update & Testing a New Ceiling Light Design
- 12. Modeling a Custom Baseboard & Creating a Holdout Mask
- 13. Fixing Small Details & Final Touches
- 14. Camera Setup & Rendering Final Images
Whether you’re into Blender, interior visualization, or just want to see how real projects get executed — this video is for you. It’s packed with valuable insights, workflow tips, and practical tactics you won’t find in polished tutorials.
You’ll see how to balance speed and quality, how to keep moving even without the “perfect” method, and how to refine your workflow step by step.


📦 Download Assets
Now’s a good time to download the files — you might need them as you’ll see me use them in a couple of the videos. Also, if you want to skip a few parts, these files might be handy. I’ve included an Empty Room.blend, for example, so you can jump ahead if you want to.
The download includes:
- Complete Room
.blendfile - Empty Room
.blendfile - A collection of Objects
.blendfile - Reality Capture and SiteScape 3D models you can import
- And a small set of reference images
This way, you can easily follow along, jump ahead, or experiment on your own terms.
🔒 ⭳ Download: Assets.zip1. Preparing 3D Scans

In this video, you’ll first see how to create a 3D scan of a room using Reality Capture — by importing photos, aligning them, generating the 3D model, optimizing it, creating textures, and exporting the final mesh.
Then, we’ll bring that Reality Capture scan into Blender, scale it correctly, clean up unnecessary parts, and align it to the grid to prepare for clean modeling.
After that, we’ll do the same process with a SiteScape point cloud scan — importing it into Blender, adjusting its scale and alignment just like we did with the Reality Capture model. Additionally, we’ll set up a Geometry Nodes system to display the point cloud with correct colors in both the viewport and render view.
This workflow lets you easily turn both photo-based and LiDAR scans into clean, usable 3D references for interior design and visualization projects.
2. Building a Clean 3D Room Model from Scans

In this video, we’ll turn our 3D scans and a few real-world measurements into a clean, accurate room model in Blender.
We’ll start by modeling the walls, then cut out window openings, and finally create the floor and ceiling.
For better workflow, we’ll split the room into two parts — making it easier to hide certain areas when working or rendering from specific angles.
Throughout the process, we’ll keep the mesh clean: making sure the normals are facing the right way, removing double vertices, and avoiding any geometry issues that might cause problems later.
3. Adding Windows, Materials, and Making Test Renders

In this video, we’ll continue working on the room by adding windows. We’ll import them from a separate .blend file and adjust their size and placement to match each window opening precisely.
Next, we’ll apply a texture to the floor and unwrap the UVs properly to ensure a clean result. We’ll also add base colors to the walls and adjust the window materials for a more realistic look.
Finally, we’ll set up two simple test renders to help compare different material and lighting setups and see how the scene is coming together.
4. Modeling a Desk and Placing First Interior Objects

In this video, we’ll model a table that fits the room layout, create proper UV maps for it, and use a bevel modifier to make the edges look more realistic.
Next, we’ll add a few simple objects on top of the table and place a rug on the floor to bring more life into the space.
Finally, we’ll do a test render to see how the most used part of the room is starting to come together visually.
5. Lighting Setup – Creating a Controller Panel for Lights & Environment

In this video, we’ll build the foundation for our scene’s lighting system. While the lighting setup will evolve further in upcoming videos, here we create a flexible controller panel that lets us switch between day and night environments — and adjust other key lighting elements — all from one place.
This setup not only streamlines our lighting workflow but also introduces techniques you can reuse in future projects for controlling different visual states with ease.
I’ll also walk through my reasoning for light placement, aiming to match the logic of real-world illumination and atmosphere.
6. Room Vision, Adding Objects & Making Custom Ceiling Lighting
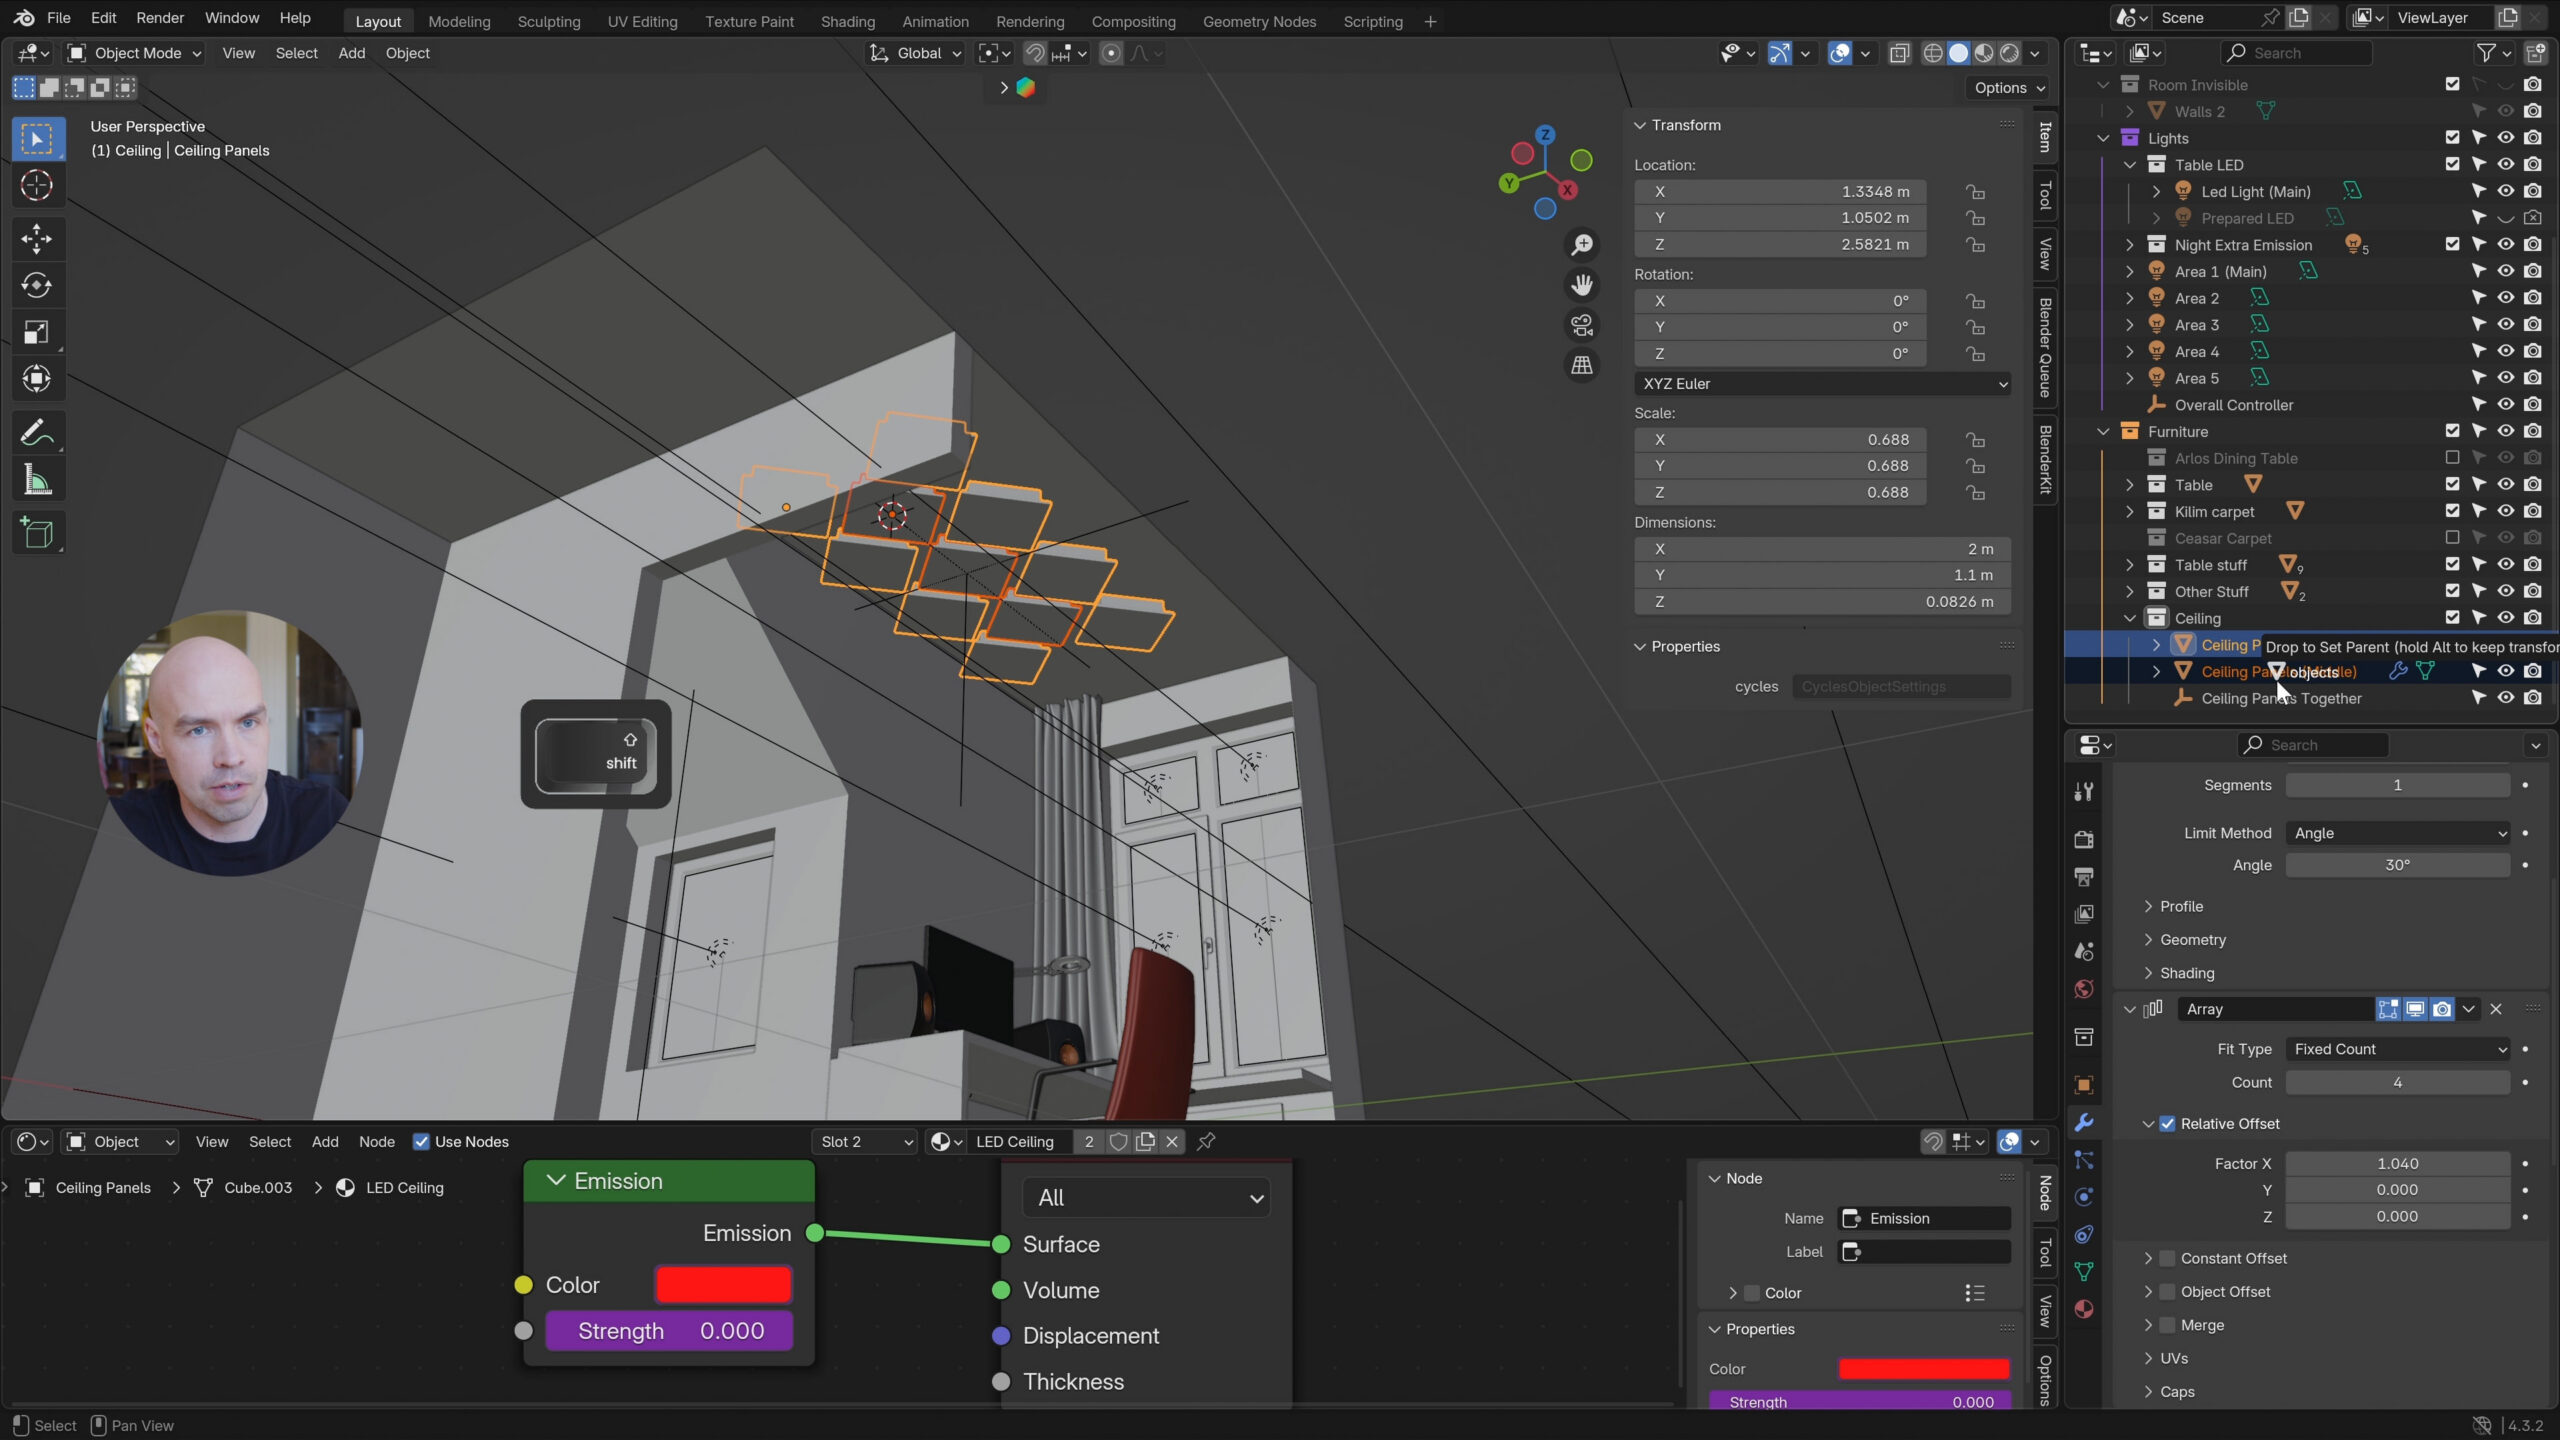
In this video, we start by outlining the intended use and vision for the space — understanding the purpose of the room helps guide the design and object placement throughout the project.
Then, we move on to adding more detailed elements: a curtain, a computer setup, windowsills, a radiator, and other small touches that make the space feel functional and real.
The main focus of this video is the ceiling lighting setup. We’ll create custom rectangular acoustic-style panels with integrated LED strips, using the array modifier to efficiently duplicate the elements.
We’ll also explore an alternative ceiling lighting method that achieves a soft, diffused LED glow using a different approach — giving you options to fit various interior styles or lighting needs.
7. Modeling a Sliding Door and Adding an Acoustic Panel with Wood Slats
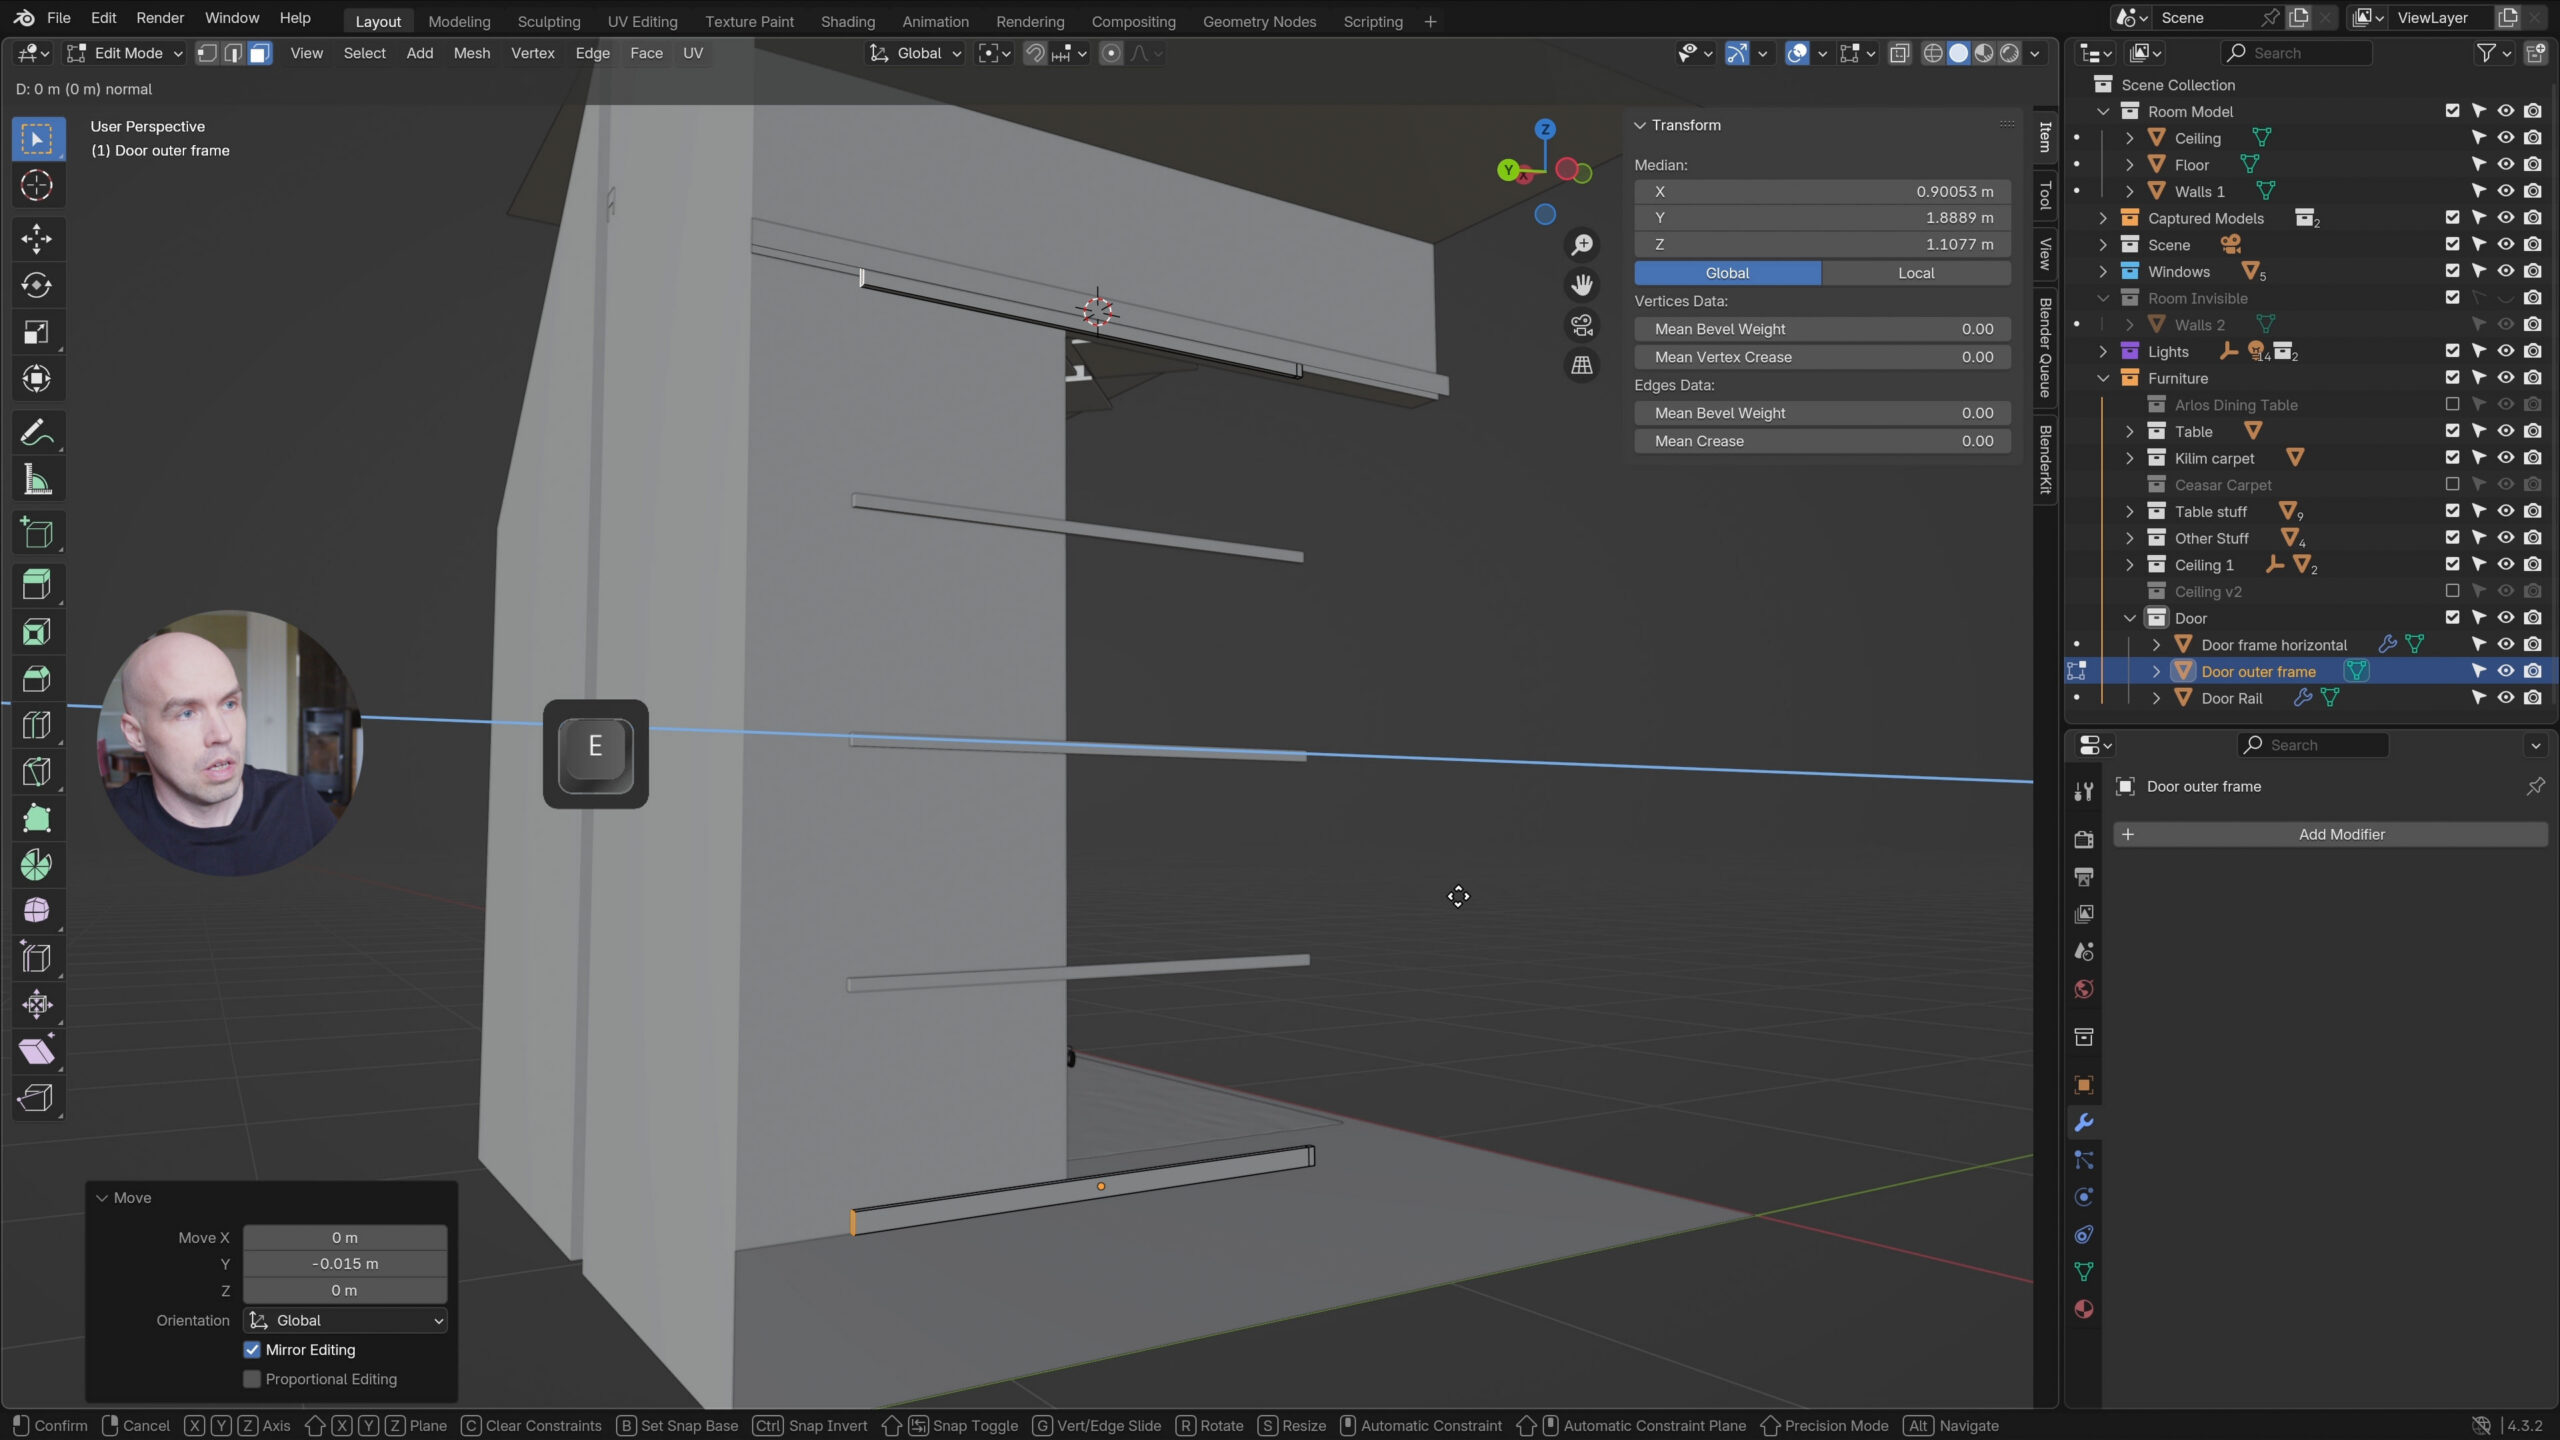
In this video, we model a sliding door with an upper rail, and then add materials to both the frame and the glass — fine-tuning them to closely match the real-life version in my home.
Next, we create a wooden acoustic panel near the desk using vertical slats. After placing it, we trim the excess geometry using the knife tool, which we explore in more detail here.
As a final touch, we also adjust the LED groove in the desk model — expanding it to better reflect light onto the wall after adding the acoustic panel.
8. Wall Color Test, Customizing Sofa & Adding Shelves with LED Lighting
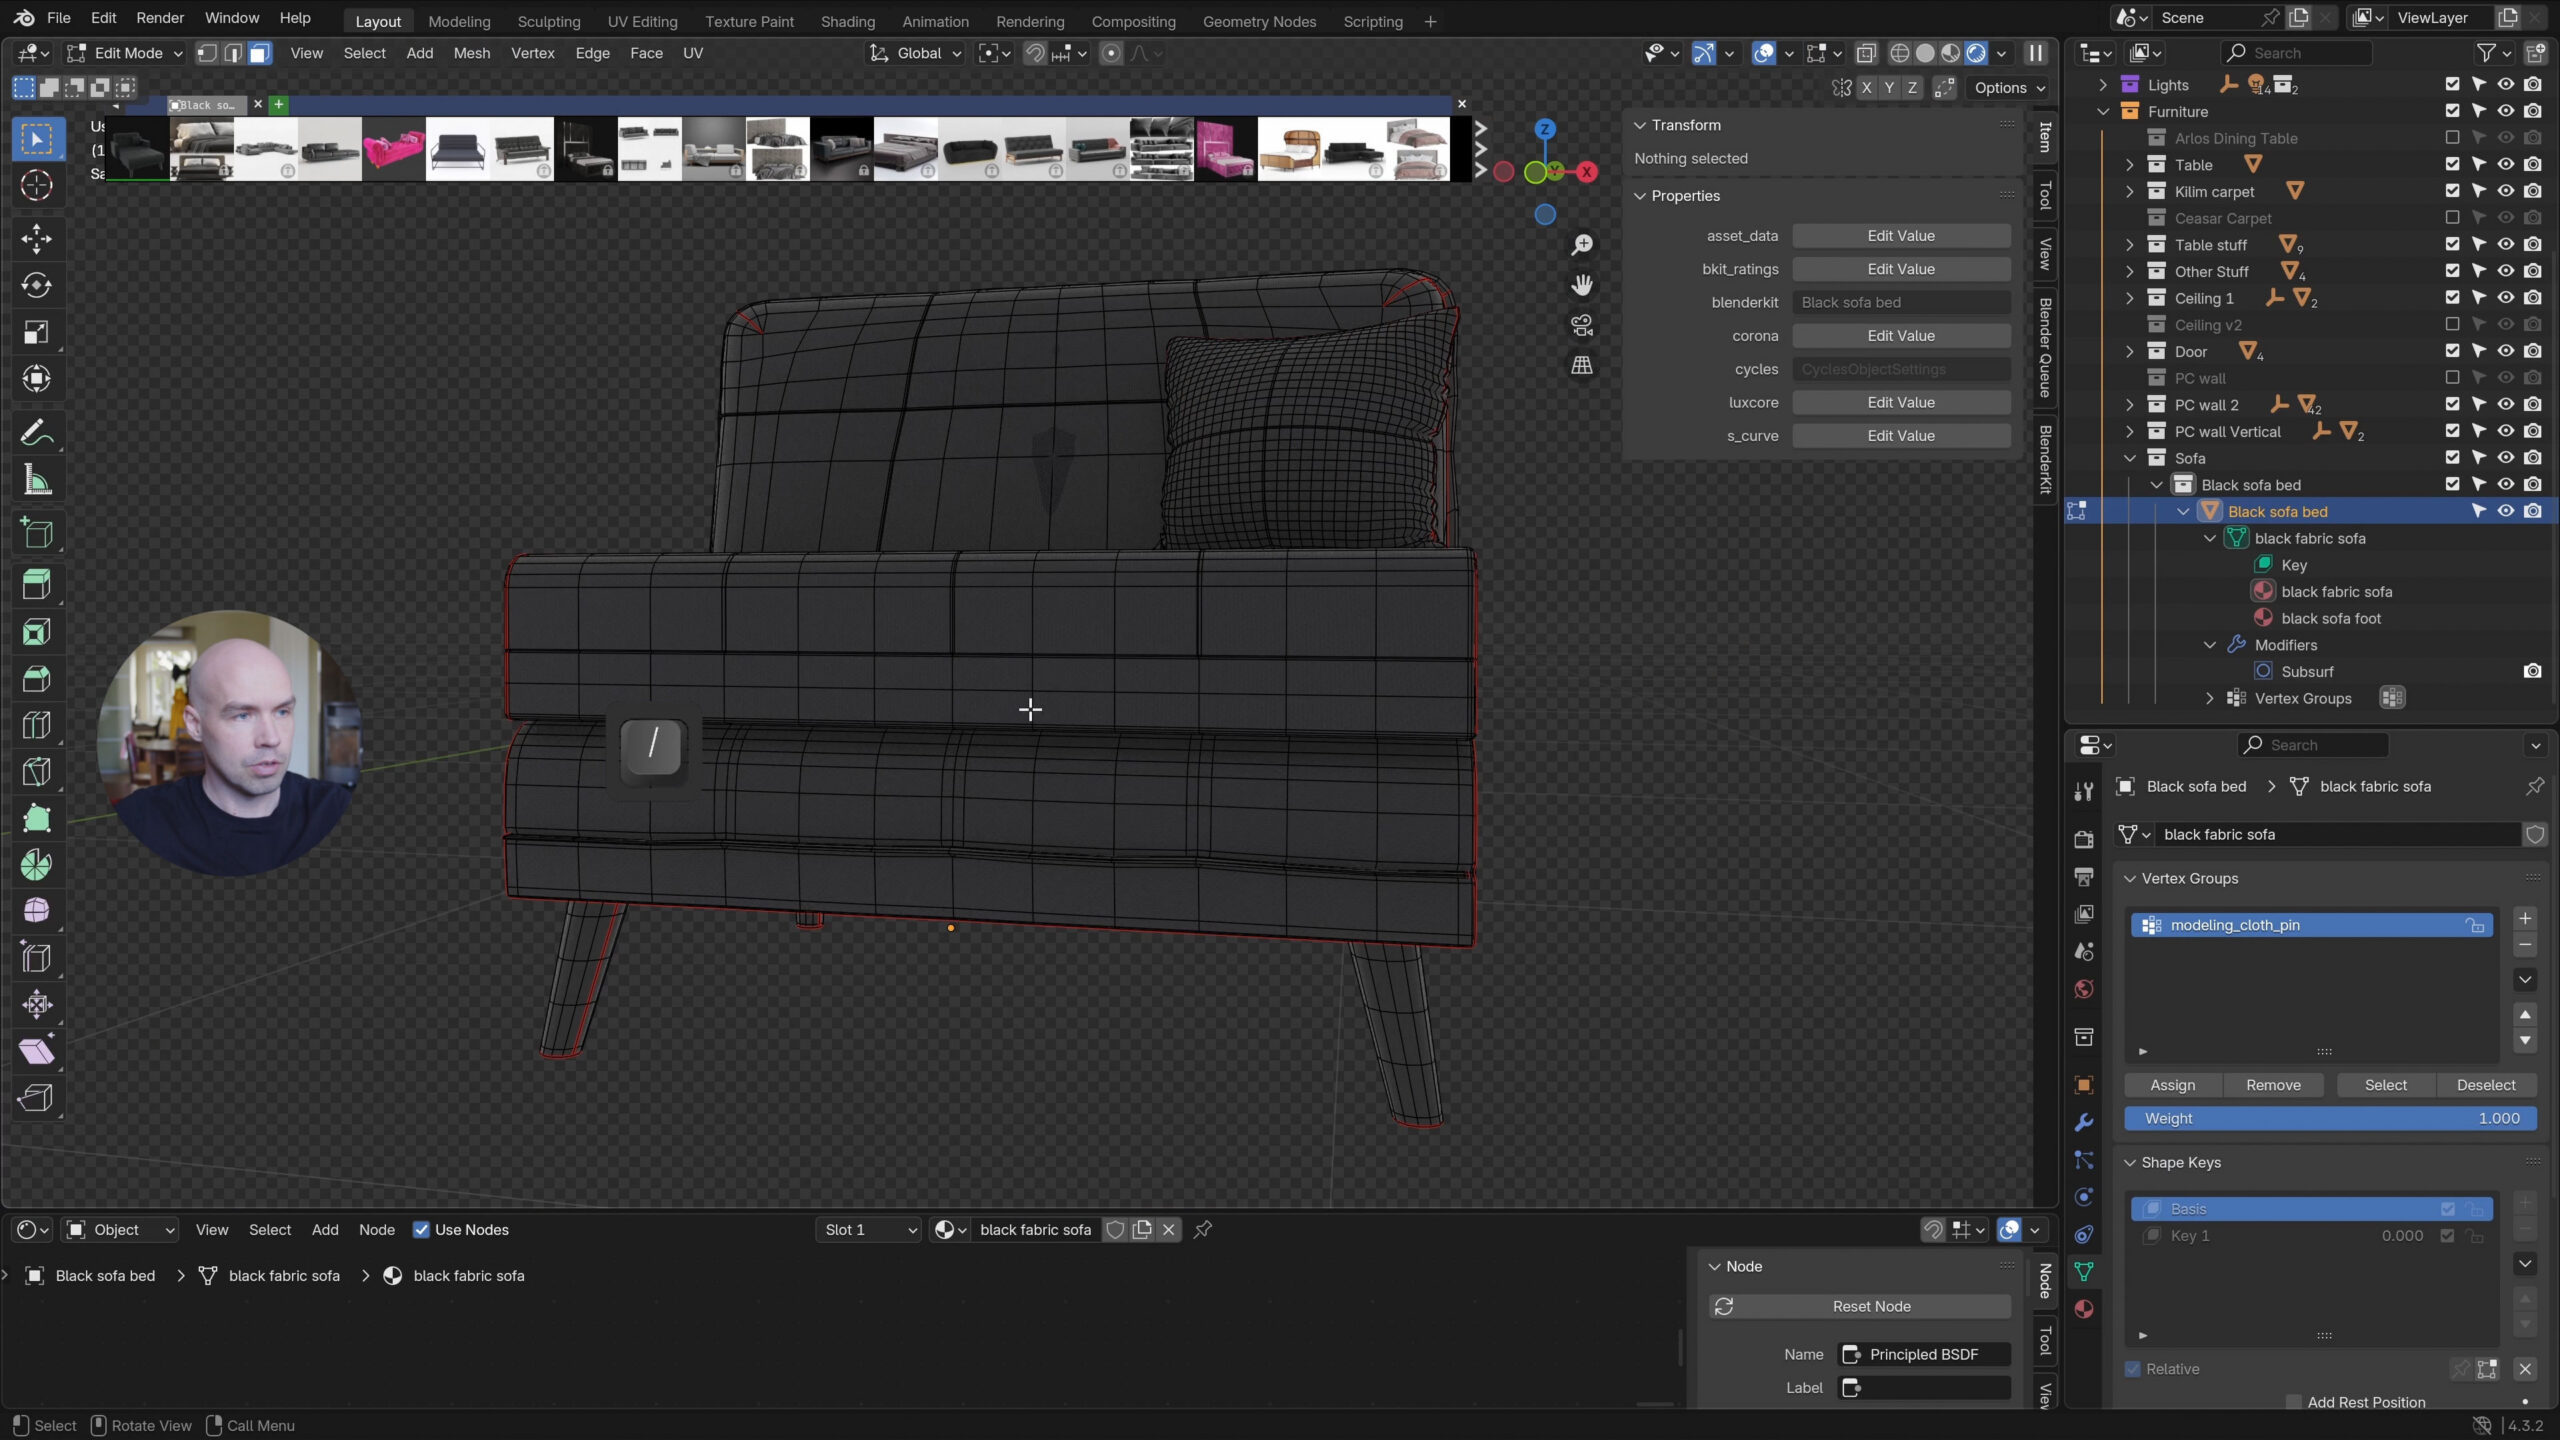
In this video, I start by testing a lighter wall color to see if it would bring more light into the room and improve the overall feel of the space.
Next, I add a sofa and customize it to fit the room — adjusting its size and proportions, and adding cushions from another sofa object that had previously been joined together.
Finally, I place shelves on the wall and add a few LED lights to complement the setup and enhance the room’s atmosphere.
9. Adding Small Objects & Custom AI Wall Art

Now that the larger furniture is in place, we focus on filling the room with smaller objects — books, plants, and other decorative items that add life and personality to the space.
Along the way, we also go over the Drop to Ground technique to quickly and accurately place objects on surfaces.
Finally, we experiment with wall art — testing various frames and layouts, and ending with a custom AI-generated football-themed image to give the room a unique, personal touch.
10. Designing the TV Wall, Shelf Items & Comparison Render

In this video, we focus on shaping the TV wall. We start by testing an acoustic panel approach similar to the one used at the desk, but eventually move toward a cleaner and simpler look that better fits the space.
Next, we populate the TV shelves with realistic items like a PlayStation, game cases, and similar items to bring more character into the scene.
We make a comparison render — allowing us to evaluate the latest version side-by-side with previous iterations, identify what’s working, and spot areas that need improvement.
11. Nighttime Look Update & Testing a New Ceiling Light Design
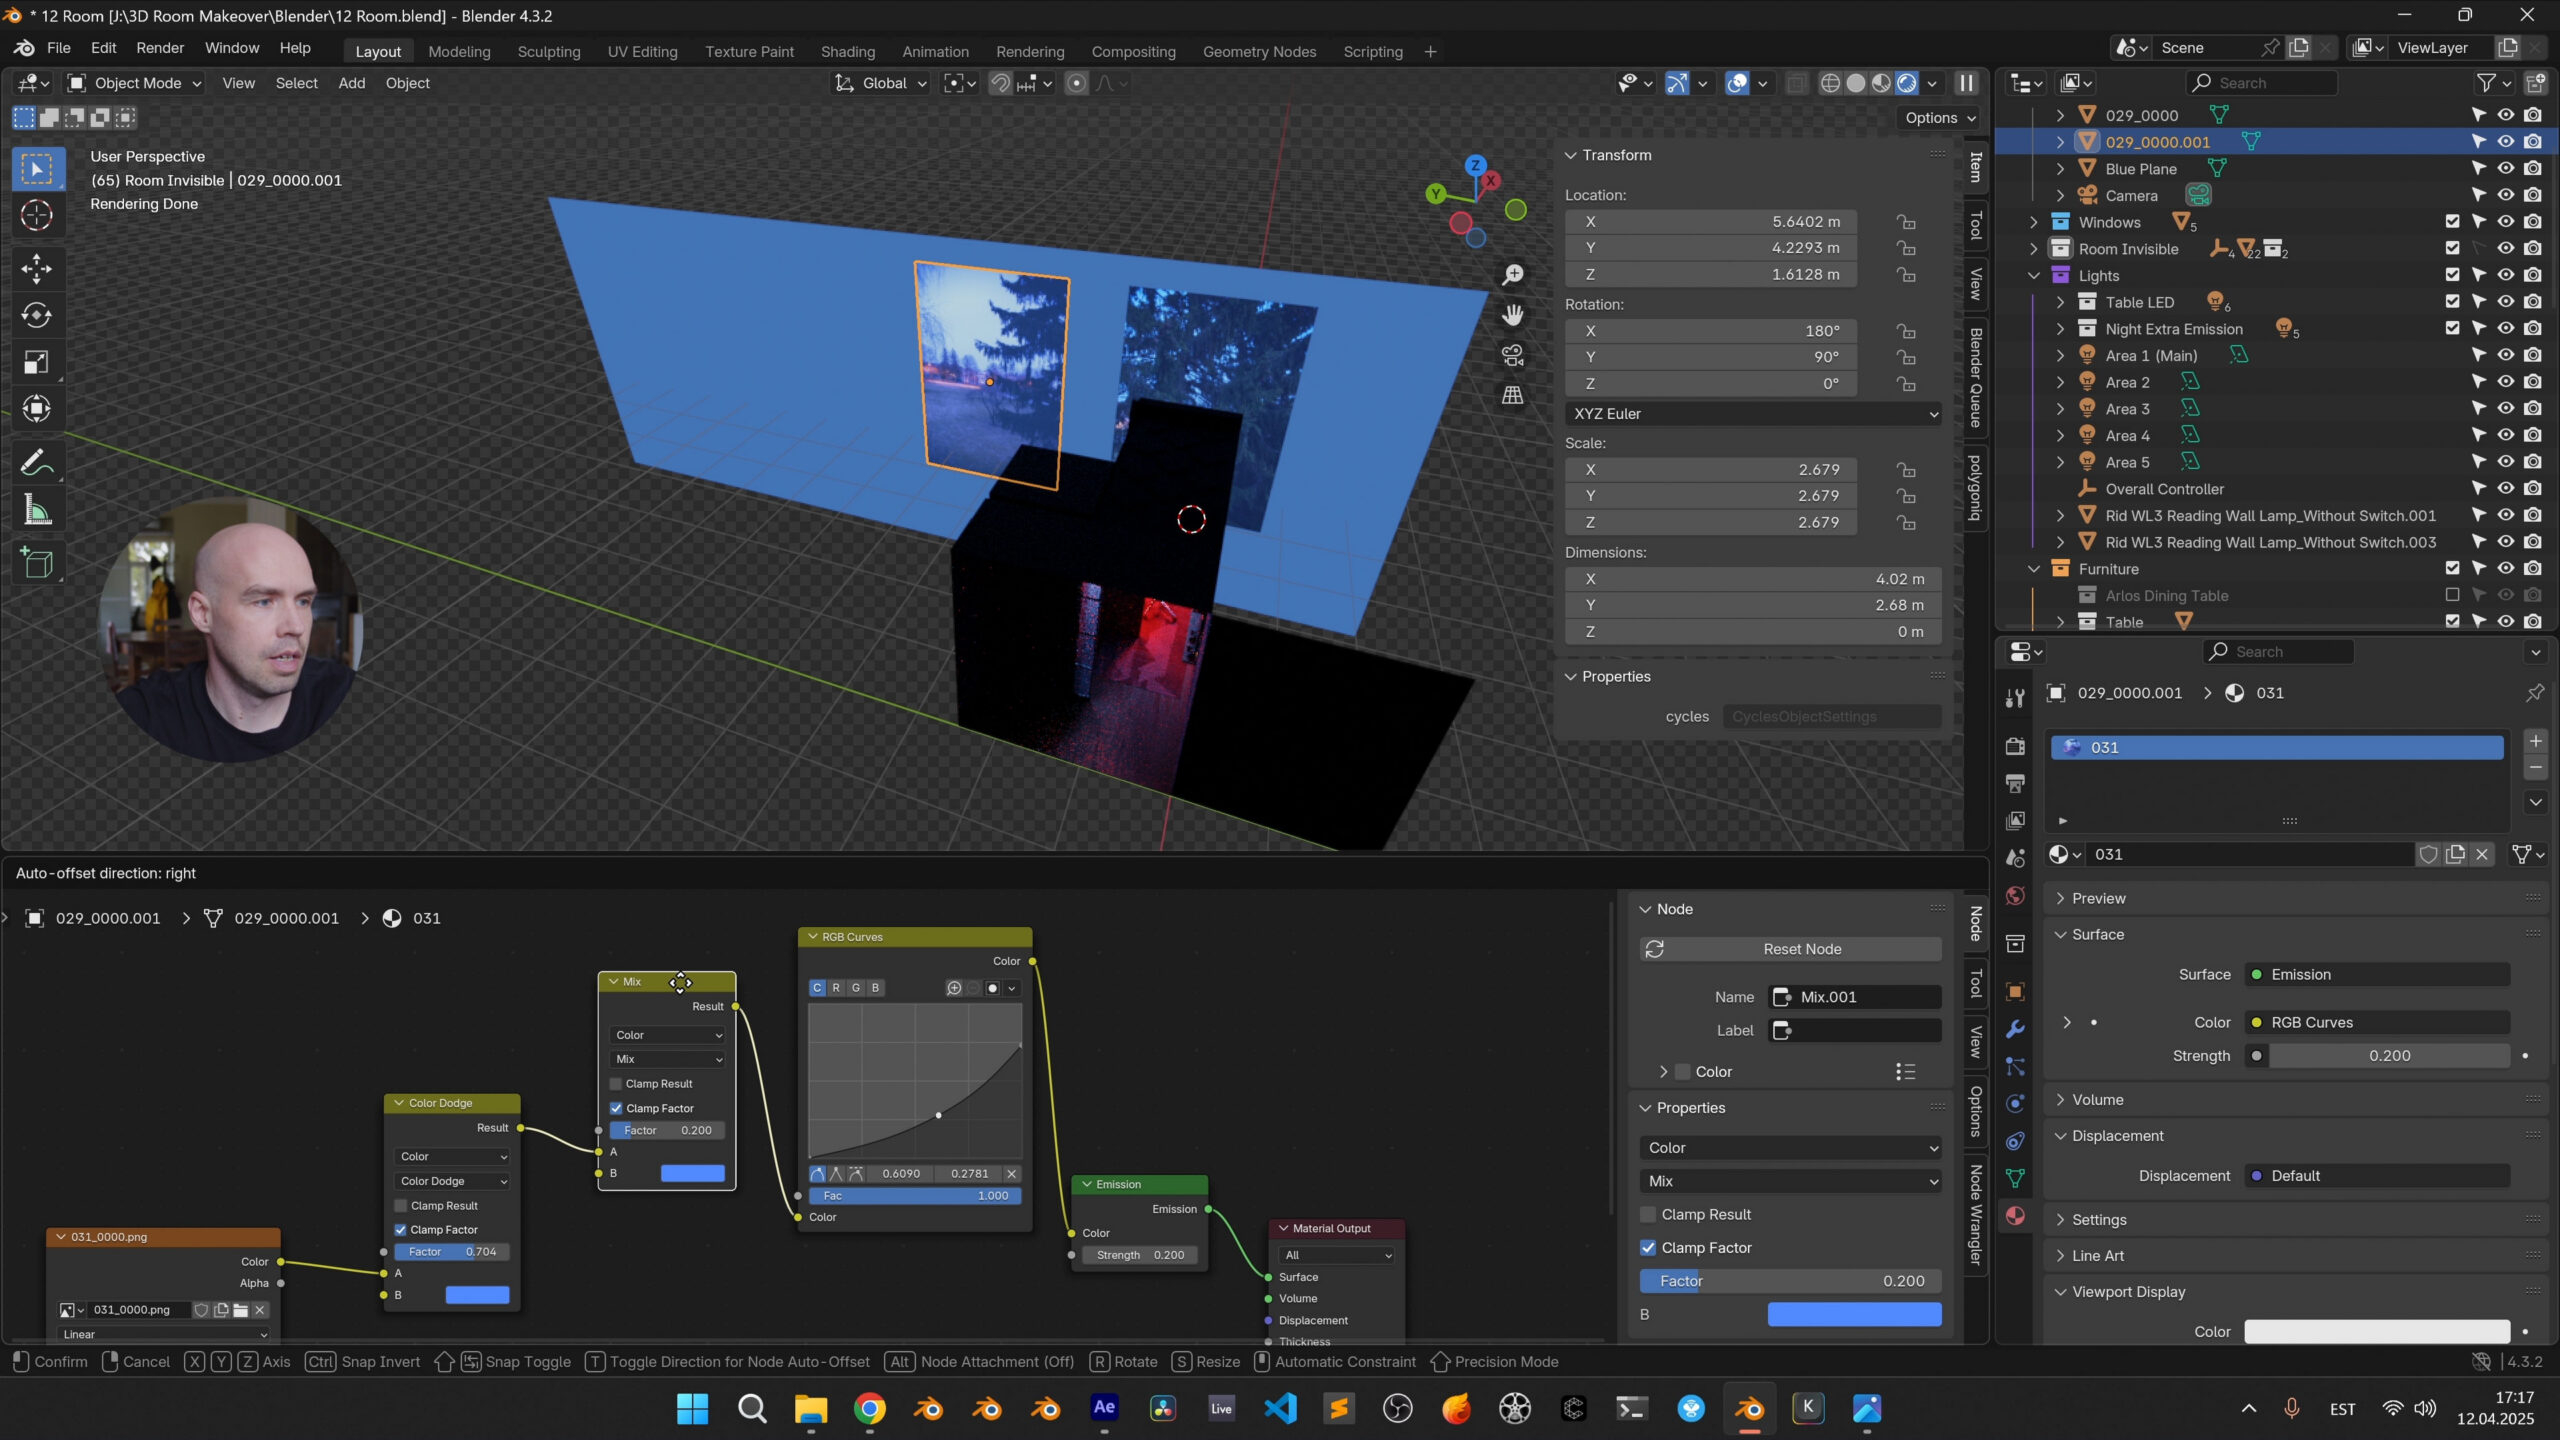
In this video, we update the night lighting setup. Instead of having windows emit a bluish glow, we make them transparent and place light sources behind them, combined with background images to create a more natural nighttime look.
We also experiment with a new ceiling lighting design. During this process, I show a useful method for quickly switching between different mesh versions of an object, which can help streamline design exploration in other projects as well.
12. Modeling a Custom Baseboard & Creating a Holdout Mask

In this video, we create a custom baseboard by referencing the actual profile currently used in the room. Using a photo as reference, we model simplified geometry and apply bevels where needed to accurately match the real shape.
We also create a simple blocking object, move it to a separate collection, and then set that collection to holdout mode — a useful technique for hiding elements in final renders across many types of projects.
13. Fixing Small Details & Final Touches

At this point, the 3D room is nearly finished. In this video, we go through a list of small issues I noted during the previous comparison render and work through them one by one — polishing the scene and tightening up the last few elements for a refined final result.
14. Camera Setup & Rendering Final Images

In the final step of the project, we look at how to set up cameras for rendering. I demonstrate a few different framing and composition techniques, then we render out the final images of the room from multiple angles to showcase the finished scene.