User Guide
This guide is designed to provide you with direct instructions on how to use the “Blender Queue” AddOn for Blender, enabling you to batch render your projects and improve your workflow.
Contents of the Blender Queue AddOn Manual
Installing the AddOn
To install the “Blender Queue” AddOn download the zip file. Ensure it remains zipped after download, especially Safari users who may need to re-zip it. In Blender go to “Edit” -> “Preferences” -> “Add-ons”, click “Install…”, select the zip, and then click “Install Add-on”. Enable the AddOn by checking its box in the list. A new “Blender Queue” tab should appear in the 3D viewport’s right-side panel.
Step-by-Step Guide: Installing the “Blender Queue” AddOn
- Downloading the AddOn:
- After completing your purchase, download the “Blender Queue” AddOn from the “order received” page. Alternatively, access it later via “My Account” -> “Downloads”.
- Saving the Zip File:
- Save the downloaded zip file, named similarly to “blender_queue_v1_0_0-8w2alr.zip”, in an easily accessible location, like your downloads folder. This file can be deleted after installation.
- Maintaining Zip Format:
- Ensure the file remains in zip format. Safari users may need to re-zip the file if the browser automatically unzips it upon download by right-clicking the folder and selecting “Compress ‘blender_queue_v…'”.
- Installing the AddOn in Blender:
- Open Blender (version 3.5 or newer required). Navigate through “Edit” -> “Preferences” -> “Add-ons”. Click the “Install…” button located at the top right, then use the “Blender File View” to find and select the zip file. Click “Install Add-on” at the bottom right.
- Activating the AddOn:
- Check the enable box for “Blender Queue” to activate it. To save your changes, you may need to click the triple bar icon ≡ at the bottom left and select “Save Preferences”. Close the Blender Preferences window afterward.
- Accessing Blender Queue:
- A new tab labeled “Blender Queue” should now be visible in the right-side panel of the 3D viewport. Press the N key to open it if it’s not already displayed.
Following these steps will ensure the “Blender Queue” AddOn is installed and ready for use in Blender.
General Usage of the AddOn
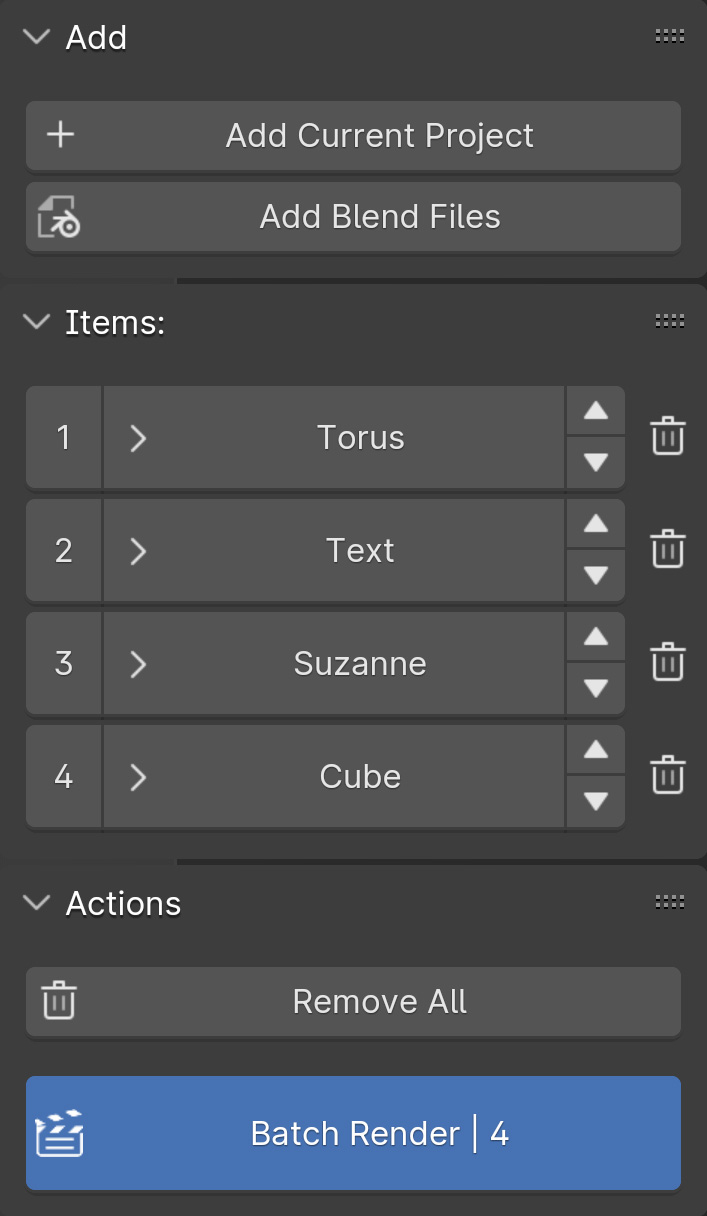
To utilize the “Blender Queue” AddOn, start by adding the project files you wish to render. This can be done through the “Add Current Project” button, which adds the currently open project to the list. Alternatively, the “Add Blend Files” button allows you to select one or multiple projects through the Blender File View window. Once your desired projects are added, you can start rendering by pressing the “Batch Render” button, which sequentially renders all the added blend project files and their scenes. After all projects have been rendered, you can clear the list by pressing the “Remove All” button.
Step-by-Step General Guide: Using the “Blender Queue” AddOn
- Accessing the Blender Queue Panel:
- Locate the Blender Queue panel on the right side of the 3D viewport. If this menu is closed, press the N key on your keyboard to reveal it. Then, click on the “Blender Queue” tab among the vertical tabs.
- Adding Projects for Rendering:
- Under the “Add” panel, you’ll find the “Add Current Project” and “Add Blend Files” buttons for adding project files to the render list.
- Add Current Project:
- If you have the desired project file open, press the “Add Current Project” button to add this file to the list. If the file contains different scenes, they will be added as separate items in the render list.
- Add Blend Files:
- To add files without opening them, use the “Add Blend Files” button. This opens the Blender File View, allowing you to select one or multiple files. For a single file, click on it and then click “Add Blend Files” at the bottom right of the window. To select multiple files, hold down the Ctrl key and click on them sequentially, then press “Add Blend Files”.
- Add Current Project:
- Under the “Add” panel, you’ll find the “Add Current Project” and “Add Blend Files” buttons for adding project files to the render list.
- Rendering the Added Files:
- Once the files are added to the render list, press the “Batch Render” button to start rendering.
- Clearing the Render List:
- After rendering is complete, press the “Remove All” button to clear the list.
Note: After adding render files, the “About” panel will be replaced by the “Actions” panel, offering additional functionalities.
Using the “Items” Panel in the AddOn
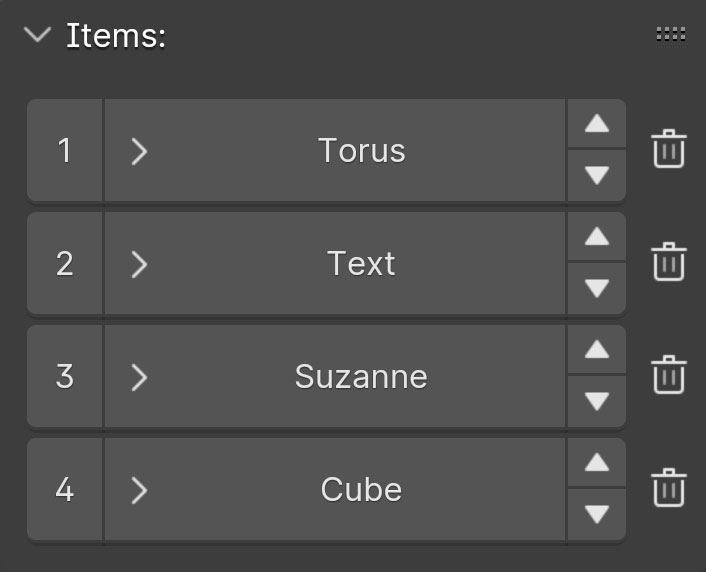
The “Items” panel in the “Blender Queue” AddOn is where you’ll manage the list of project files added for rendering. This panel is used for organizing and controlling how your projects are handled within the queue.
- Viewing and Managing the Project Files List:
- The “Items” panel displays all the project files you’ve added through the “Add” panel. Here, you can see a the list of the projects queued for rendering.
- Reordering Project Files:
- You can change the order in which the project files are set to be rendered using the up and down arrow buttons next to each item in the list.
- Enabling/Disabling Files for Rendering:
- Each project file in your list has a corresponding checkbox, represented by a number, that allows you to enable or disable it for rendering. Clicking on the number will disable the item from the batch rendering process without removing it from the list. This is particularly useful for temporarily omitting certain projects from the render queue. To re-enable an item for rendering, simply click on the empty checkbox where the number previously was.
- Removing Project Files:
- Should you need to remove a project file from the list entirely, you can do so on a file-by-file basis by clicking the trash can icon next to the respective item.
- Accessing Dedicated Information and Controls:
- Each item in the list has a dedicated section where you can view specific information and access various controls. To open this detailed view, click on the item’s name. Learn about it in next section.
Item Information and Controls
Each item in the render list of the “Blender Queue” AddOn has a section that provides detailed information and access to specific controls. To open this detailed view, click on the item’s name.
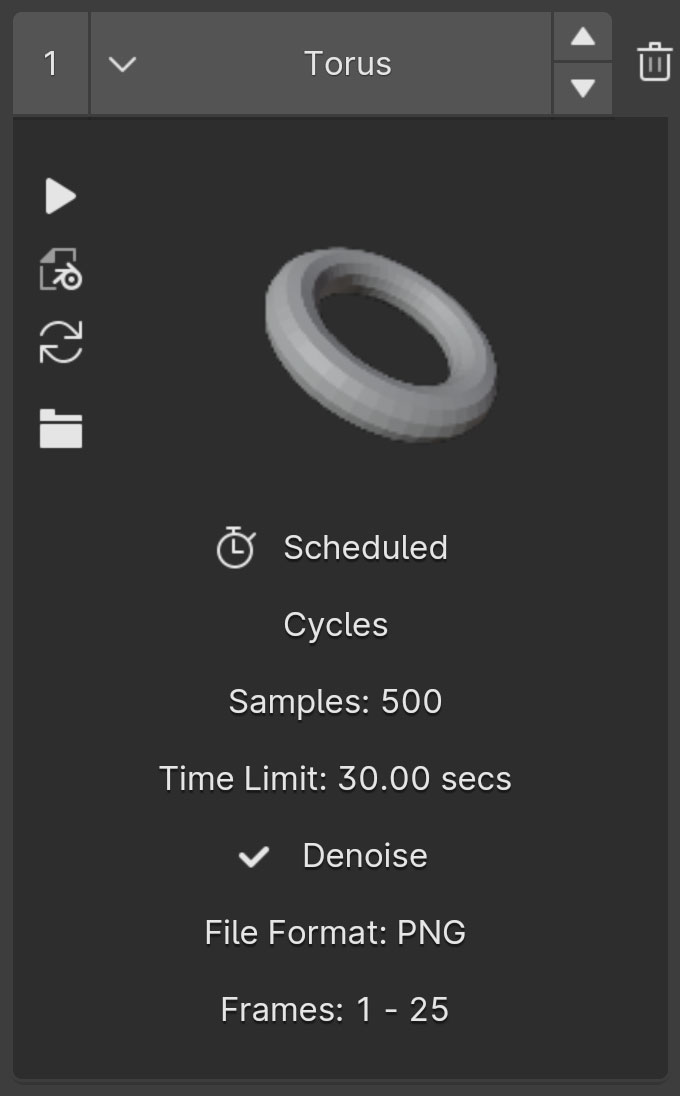
In the dedicated info window, you will find the following shortcut buttons:
- Play Animation: Allows you to review the animation after rendering.
- Open The Blend File Directly: Opens the corresponding .blend file for any necessary modifications.
- Refresh File Info: Updates the main information of the item if there have been changes to the render engine, samples, time limit, denoise, output format, or frame range since the file was added to the list.
- Open Output Folder: Opens the folder where the rendered output is stored.
Beside the shortcut buttons, you’ll see a thumbnail of the project. After rendering, this thumbnail is replaced with the last rendered frame, giving you a quick visual reference of the render result.
Below the thumbnail, you’ll find detailed information about:
- Item Status: Indicates whether the item is “Scheduled” or “Rendered”, or shows a warning if there’s an issue.
- Render Engine: The engine used for rendering the project.
- Samples: The number of samples set for the render.
- Time Limit: If a time limit per frame is set, it will be displayed here.
- Denoise: Indicates if denoising is turned on.
- File Format: The format in which the render output will be saved.
- Frame Range: The range of frames that will be rendered.
This information ensures you have a comprehensive overview of the most important settings before starting the render, allowing you to confirm that everything is configured as desired.
Using the “Actions” Panel in the AddOn
The “Actions” panel in the “Blender Queue” AddOn provides two primary functions for managing your rendering workflow:
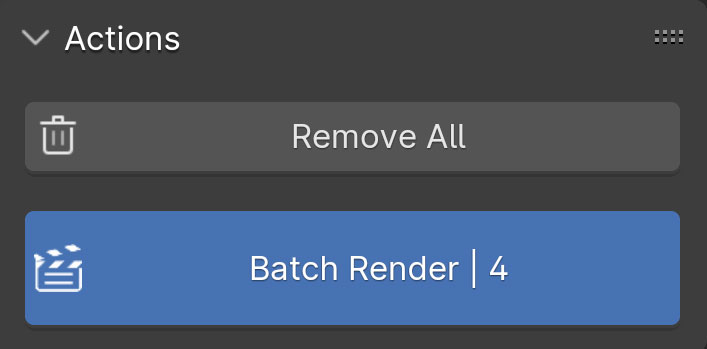
- “Remove All” Button:
- Clicking the “Remove All” button will clear all projects from the list, regardless of whether they are enabled or disabled. If you hold down the Ctrl key while clicking this button, it changes to “Remove Unchecked“. This allows you to quickly remove all disabled projects from the list in one action.
- “Batch Render” Button:
- The “Batch Render” button initiates the rendering process for all enabled items in the list. The number next to the “Batch Render” indicates the total count of projects queued for rendering. If rendering is in progress, clicking this button again or pressing Esc on keyboard will stop the rendering process. You can also find the “Batch Render” button in the main menu under “Render”.
